RD/YVPS
Hybrid Restoration
Step 11
Now we're getting there!
Time to fit the powervalve servo motor into
place. This fit just behind the headstock where
the old RG coolent expansion tank went. You
will need to extend the loom for that, but its
only 5 wires. Again you'll need to make up a
bracket or two, mines cable-tied in at the moment.
Fit the fuel tank on to check clearance Clarence,
as it can be a bit tight.

The YPVS servo motor fits in
behind the headstock.

Use the YPVS tacho and wire it into the YPVS
feed wire from the CDI. The tacho is a nice
fit into the hole left by the RG one.
Step 12
Now fit all cables etc, and adjust as normal.
Plug all the YPVS connectors and finish the
wiring as follows:
- YPVS Loom RG Loom
- Earth - Black Black/white
- High beam yellow Yellow
- Indicators single dark green Light green
- Indicators double dark brown Black (part
of a 4-way plug)
- Neutral/oil/temp light brown Orange
- Neutral - light blue Dark blue
- Oil black/red Blue/white
- Temp green/red Black/green
- Rear light blue/red Brown/red
- Rear light green/yellow White
- Rear light black Black/white
I did have a problem with backfeeding on the
indicator idiot light, but this was cured with
a couple of diodes.
I hard wired in the tail-lamp and rear indicators,
and used the YPVS headlamp block connector.
You might need to extend the battery leads but
other than that it should all fit nice and neat.
Step 13
Offer the exhausts up you will find that they
fit almost perfectly, nicely tucked out of the
way. Both pipes will need the brackets cutting
off and re-welding around 60mm further back.,
again it's going to be job of offering them
up to see. The right hand pipe will need a flat
hammering into it for the rear brake pedal.
Now re-fit the body work and fuel tank, complete
with new graphic.
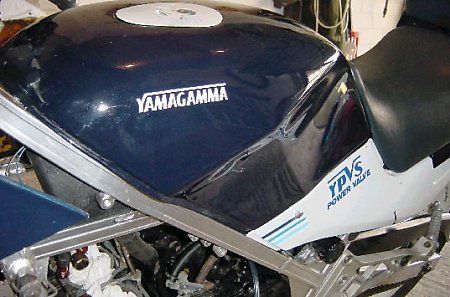
I retained the original oil tank as I can't
be bothered to pre-mix. It fits no problem and
you can wire the level light in as well.
Now you can fit the battery, switch it on,
listen to the familiar sound of the valves cleaning,
and fire it up! Take it easy on the first test
ride, keep it short and keep an eye on things
like the temp gauge. Then get home – and
have a large beer(s).
Step 14
Pull the whole thing apart and put it back
together properly.
Page
1 | Page
2 | Page
3 | Page
4
The information on this page was
kindly provided by www.cultofelsie.co.uk.
|


